Saturday, February 26, 2011

Spring Chick!!


Okay....the inspiration of this card is not from my own imagination, but from a gift tag, I recently saw, shaped like an Easter egg!  I took a standard pre-cut, plain, white greeting card and cut a piece of yellow print scrapbook paper from the DCWV Flower Shower Spring Stack.  I then took the green print frame from my Martha Stewart School Days Multimedia Pad.  On the back of the frame I adhered a piece of yellow felt.  I then attached the the black brads from Creative Imaginations for the eyes.  I cut small pieces of orange felt for the hands, feet, and beak.  I took my white Gelly Roll pen and lightly outlined the orange felt.  I found the cute Easter stamp in the dollar bin at Joann's!!  (I just can't pass up a great deal!!) I stamped the words onto some off-white paper and adhered the paper to a piece of lime green cardstock.  I then used bead cord to create the handles for the sign.  I topped this cute chick off with a few black feathers that I had stashed away in my craft room.  Hope you like him!!          Happy Saturday!! Patty


Click on the images for a larger view.

Friday, February 25, 2011

Butterflies and Flowers.....

I crafted two cards during our windy, rainy, Thursday afternoon.  The warmer temperatures have the frogs singing in our nearby pond and the birds have been chirping at 7:00 a.m. as I head off to school.  It looks like Spring is definitely on the way.  My husband pruned my jungle of grapevines this week as I plodded around the garden looking for the hint of spring flowers popping their heads out of the ground.
   The iris card was cut using purple cardstock. The beautiful iris embellishment is from DCWV.  I used my Cuttlebug to emboss the iris background paper and found some sweet little matching beads down in my craft room that paired up perfectly with the embossed flowers (see the close up). The lavender paper is from the K&Company Specialty Paper Pack.  This was a simple card to make, but I think it's simplicity makes it lovely. 
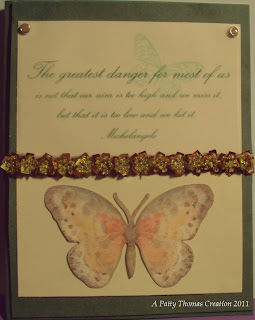
   The butterfly card was cut using a double layer of green cardstock.  The vellum quote is from Best Occasions.  I think the butterfly theme of the vellum worked out perfectly with the DCWV butterfly embellishment.  The brads are from Creative Imaginations and I placed the strategically to cover the glue dots holding down the vellum.  They were a perfect fit.  The beading is from a by-the-yard cut from the fabric department of Hobby Lobby.  I have had a sewing room for quite a while and love it when I can incorporate two different areas of crafting.  I used a regular piece of ivory paper as the background for the butterfly and vellum quote.  Hope these cards inspire you to get out to your flower garden and look for signs of Spring!!!
Have a great weekend!!


Click on images for a larger view

Thursday, February 24, 2011

Still Learning.....But Lots of Helpers Out There!!

Just wanted to drop this line to say a special "Thank You" to those who are sending me instructions, information, tools, etc.  I greatly appreciate the response.  The "papercrafting community" is full amazing people!!  I'm learning about techniques, challenges, how-to's, etc.  I love visiting your blogs and finding even more inspiration.  A special thanks to Roxx. T.  who has been very helpful with supplying me information about blog creation, challenges, etc.  Through her blog http://www.dreamsofcrafting.blogspot.com/ I found information about a great give-away that I happily agreed to post.  Take a peek at Cindylu's Scrapping Room at http://www.scrappingroom.blogspot.com/ for a chance to win some great items.  I've also agreed to post her link....see it in "my favorites" in the sidebar.  Her site has several links to other blogs with great give-aways and "blog candy"...like the treats found at Feline Creative at http://www.felinecreative.blogspot.com/ It's almost Friday!!!   Have a great one!!   Patty

Sunday, February 20, 2011

A Little Scrap of Ribbon.......


A little scrap of ribbon provided the inspiration for these two cards.  I had received the ribbon on a Christmas gift and the pack rat inside of me just did not dare to throw it away!! I think it made a nice embellishment for both cards.  I paired the ribbon up with the paper from My Minds Eye. The coordinating paper from their Wild Asparagus collection is just beautiful.  I used rub-on transfers for the wording from Colorbok and I used my Fiskars punch to create the decorative borders.  I continue to practice making the paper and cardstock flowers and I think they made a nice addition to these cards.  What do you think?
Have a great President's Day!   Patty T.

Thursday, February 17, 2011

We All Need A Little Hope!


(click on the image for a larger view)


My wonderful husband allowed me to go on crafty shopping spree for Valentine's Day.  I found all of these wonderful Spring products created by K&Company.  This has been a pretty rough week, (must be Spring fever!!), so I decided to create a few cards to provide some hope and inspiration.  The cards are using paper from K&Company, their Specialty pack, along with background material from their Susan Winget Botanical and Nature Designer series.  I love the clear overlays with decorative borders.  I think they make beautiful cards.  The birds, butterflies, and dragonflies are diecuts also from K&Company.  K&Company provides such amazing materials and papers that allow me to create a wonderful card in a matter of seconds. The beautiful bead/flower accent is from Prima Marketing. I think the shade of purple in the beading matches the card materials perfectly.  The word "Hope" and the shadow feature was cut using my Cricut Home Decor cartridge.  I cut the words using maximum speed and pressure at sizes of one and two inches for the corresponding cards.  I can now only hope that these "Hope" cards provide you with some cardmaking inspiration!! Have a great President's Day weekend!! Patty T.
                            (Click on the images for a larger view)

Saturday, February 12, 2011

Just Learning to Make Cardstock Flowers!!!

 Click on the photos to enlarge.
 This morning I watched a video tutorial on YouTube on how to make paper flowers.  I got the inspiration from the recent CHA demonstration by DCWV.  They used some of my favorite cardstock to create beautiful dresses.  Here is a link to the dresses site:  http://dcwvinc.blogspot.com/2011/01/cha-day-1-continued.html .  I thought the paper dresses were amazing. Now, I don't know if I'll ever construct a dress, but I wanted to try my hand at constructing the paper flowers.  I thought my first run turned out pretty well....what do you think?  Please note, these are fresh off the craft table and I haven't even trimmed the glue yet!!  If you would like to have the link to the YouTube video....leave your email address in my comments.  Thanks for visiting!!  Patty
Click on the photos to enlarge.

Monday, February 7, 2011

For the New Baby

I began to think pink, blue, and yellow as I long for Spring to arrive. As I brought out paper of these colors I decided to put together this cute little baby card. Perfect for a boy or girl, the carriage is a pretty patchwork paper from Studio 29. The carriage is from the Mother's Day Cricut cartridge. The carriage and shadow were cut at 3 1\4 inches. The lettering for the word "baby" and the flowers are from Heidi Grace. The buttons are adhesive and made by Colorbok. The chipboard flower also came from Colorbok. I found the Colorbok items in a "grab bag" style kit at Big Lots. Occasionally, you can find a whole "goody bag", (including paper, embellishments, stickers, etc.), for two bucks!! I love a great deal, especially when it involves my hobbies! On another note, thanks to all who have paid my little blog a visit.  I especially appreciate the support from the Cricut Community board.  Thanks so much for visiting!!  Patty :)
Click on the card for a larger image.

Saturday, February 5, 2011

Amazing Grace


It's a windy, rainy morning.....perfect for staying inside and working on a few craft projects. Just received the Winter Woodlands Cricut cartridge in the mail and couldn't wait to explore it. I started by creating this Amazing Grace card. The bird card was cut at 5.5 inches with the layered bird at 3 inches. I used more of the K&Company specialty paper for the cardstock. I used DCWV Ciao Bella for the bird layer and a scrap piece of DCWV Botanicals for the background. The gold ribbon is from the Martha Stewart Heirloom collection. I also decided to practice some stamping and embossing with this card. I used a purple Marvy embossing marker with the Stampabilities "Amazing Grace" stamp. The butterfly is a clear Martha Stewart stamp. I used purple metallic Martha Stewart embossing powder to create a wonderful, shiny effect. The Marvy heat gun is a great embossing tool. Okay...now it's off to clean up my craft bench and ponder my next project!! Thanks.....Patty

Friday, February 4, 2011

Happy Birthday

I have a couple of birthdays this month so last night I decided to sit down by the fire and craft a quick birthday card. This also gave me a chance to use my new Cricut gypsy. The purple glitzy card stock is from K&Company. The butterflies and border were cut from another one of my favorite DCWV stacks, Ciao Bella. The diamond stickies are from Michael's, and I used just a little swirl of Pazzles for the butterfly's paths. The butterflies were cut using the Cricut Indie Art cartridge. The "Happy Birthday" and accent border were cut from the Gypsy Wanderings. I hope the recipient enjoys this card as much as I enjoyed making it!! Have a great weekend! Patty T.

Tuesday, February 1, 2011

A Stormy Night for Crafting

Okay....we are having really bad winds and rain here tonight....our area is under a severe wind advisory. I just hate storms, so I decided to work on a couple more cards to keep my mind off of the weather! The first card is made using Heidi Grace word and note card embellishments. These are from the Glitter Punch-Outs stack. I used a Fiskars border punch on a sheet of pink Disney hearts paper as the background for the notecard. The ribbon is from Martha Stewart and the diamond studs were found in the dollar bin at Michaels. The background card paper is from the Paper Studio. I was lucky to find the glitzy pink, red, and white hearts at my local Dollar Tree!!


I made my second card simple but sweet. The card consists of pink and multi-striped paper from the Paper Studio. I sealed the connection between the two papers with a strip of adhesive ribbon from Martha Stewart. I then added a die-cut embellishment from HandMade Embellishments.